Managing Users & Parties
How to create and manage ledger users and Daml parties on your participant nodes.
Table of contents
Concepts
Before diving in, it helps to understand two key Daml concepts:
- Party — an identity on the ledger. Parties authorize transactions, own contracts, and define who can see what. Think of a party as a “legal entity” in your application.
- User — a ledger user that connects to a participant node. Users are granted rights to act as or read as specific parties.
A single user can have rights over multiple parties, and a single party can be used by multiple users.
Party Management
Allocating a New Party
- Navigate to Participants → select a participant node → Parties section
- Click Allocate Party
- Enter a hint — a human-readable prefix for the party ID (e.g.,
alice,treasury) - Click Submit
The system generates a full party identifier from your hint. The new party appears in the local parties list immediately.

Browsing Parties
The party list shows all known parties on a participant node:
- Local parties — allocated on this node, marked with a local indicator
- Remote parties — visible through the Canton Network but hosted elsewhere
The list is paginated for nodes with many parties. Each entry shows the party ID and display name.
User Management
Creating a User
- Navigate to Participants → select a participant node → Users section
- Click Create User
- Fill in:
- User ID — a unique identifier for this user
- Primary Party — the default party this user acts as
- Rights — select CanActAs and/or CanReadAs rights for specific parties
- Click Submit
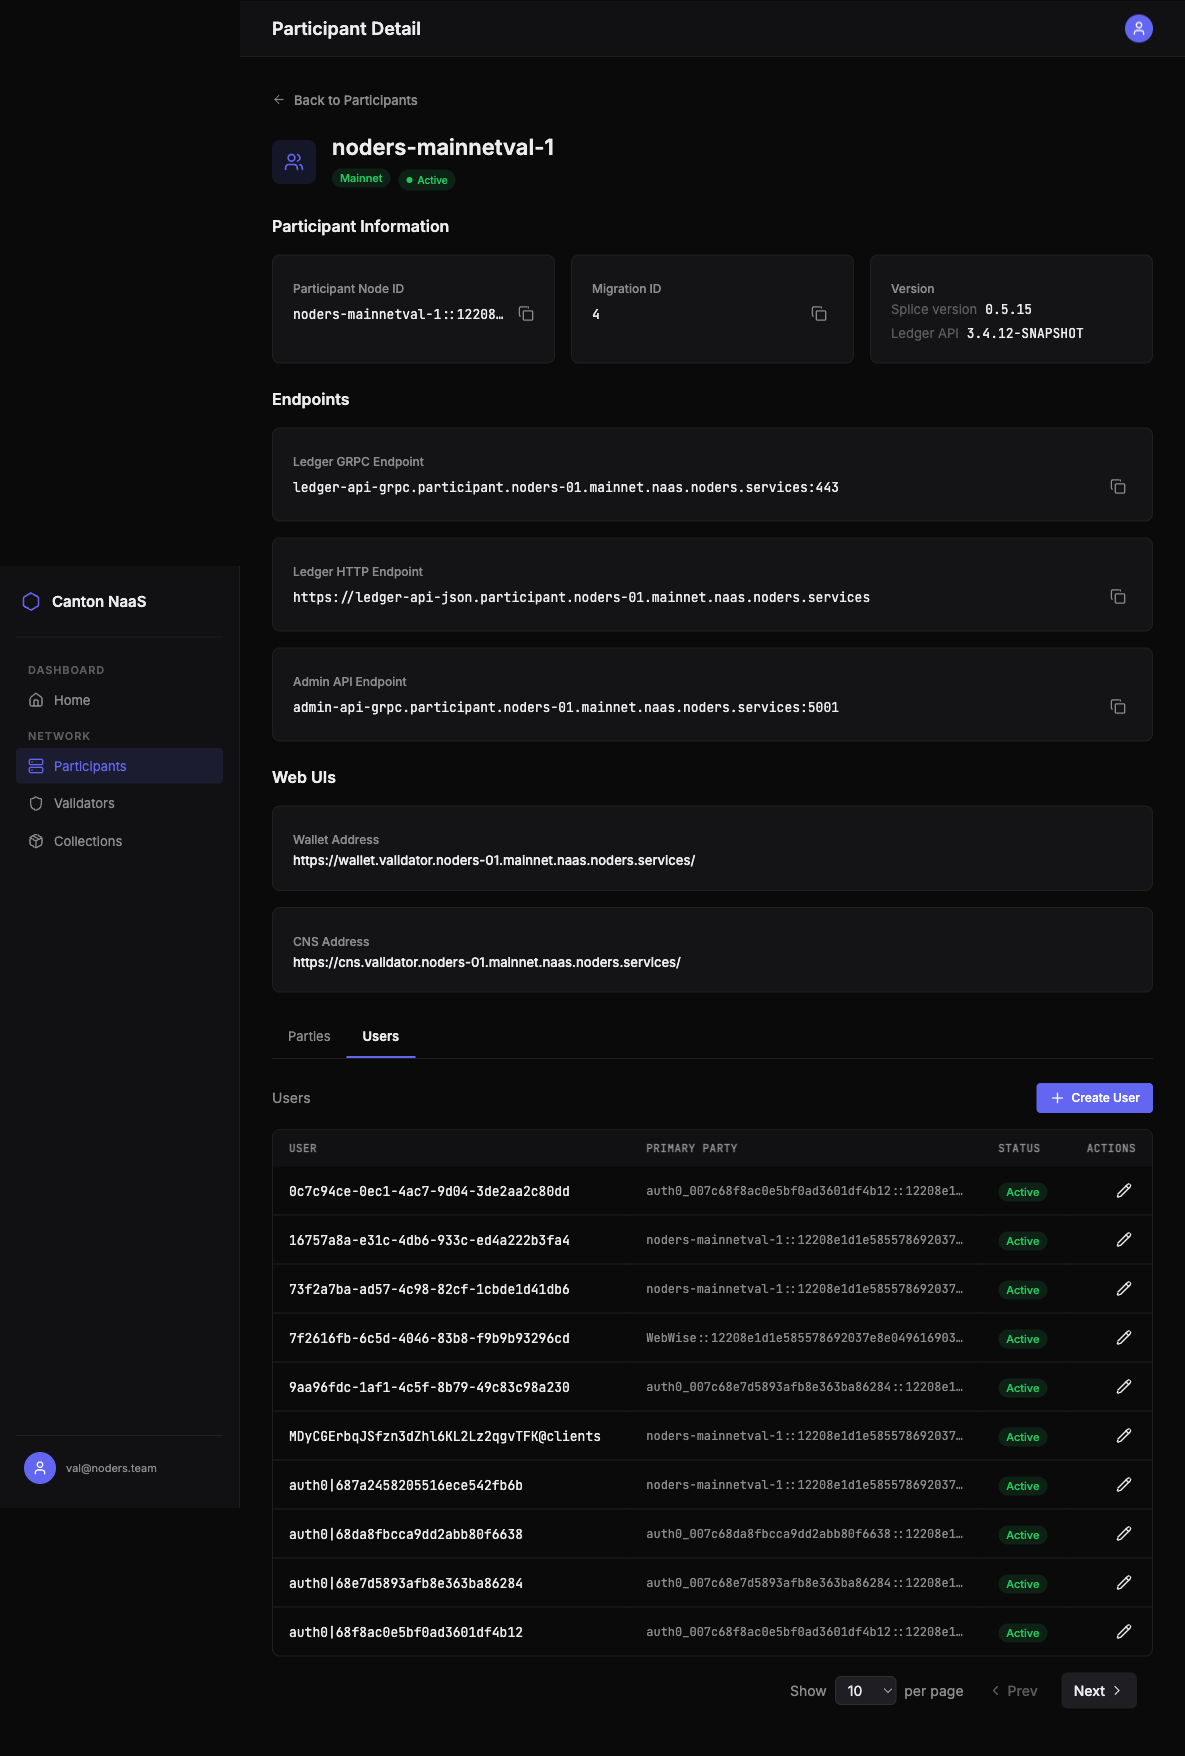
Viewing Users
The users table shows all ledger users on a participant node with:
- User ID
- Primary party
- Active/inactive status
- Action buttons for editing and management
Editing a User
Click Edit on any user to modify their properties. Changes are saved directly to the ledger.
Deactivating / Reactivating a User
Deactivating a user prevents them from interacting with the ledger without deleting their configuration. This is useful for temporarily suspending access. You can reactivate the user at any time.
Deleting a User
To permanently remove a user, click Delete. This action is irreversible — the user and all their rights are removed from the ledger.
Rights Management
Rights determine what a user can do on the ledger. There are two types:
| Right | Description |
|---|---|
| CanActAs | Submit transactions and exercise choices as a specific party |
| CanReadAs | Read contracts and transaction data visible to a specific party |
Granting Rights
- Open a user’s detail page
- Click Grant Right
- Select the right type (CanActAs or CanReadAs)
- Select the target party
- Click Submit
The right takes effect immediately.

Revoking Rights
- Open a user’s detail page
- Find the right you want to remove in the rights list
- Click Revoke
The right is removed immediately. The user can no longer perform actions associated with that right.
Best Practices
- Use descriptive user IDs — e.g.,
trading-app-prodrather thanuser1 - Follow least privilege — grant only the rights each user needs
- Use CanReadAs for reporting — if a user only needs to view data, don’t grant CanActAs
- Deactivate before deleting — if you’re unsure whether a user is still needed, deactivate first
- Allocate parties with meaningful hints — the hint becomes part of the party ID and helps with identification