Getting Started
How to access the NODERS NaaS Console for Canton Network and get oriented.
Table of contents
Prerequisites
To use the NODERS NaaS Console for Canton Network, you need:
- An active NODERS NaaS for Canton Network subscription — your Canton Network nodes must be provisioned by Noders
- An invite code — provided by your account administrator or the Noders team
- A modern web browser — Chrome, Firefox, Safari, or Edge (latest versions)
Step 1: Receive Your Invite
Your Noders account manager will send you an invite code tied to your email address. The invite is valid for 72 hours and can only be used once.
If you haven’t received an invite or it has expired, contact office@noders.services.
Step 2: Register
- Open the registration link provided with your invite
- Enter your email address (must match the invite)
- Create a password
- Click Register
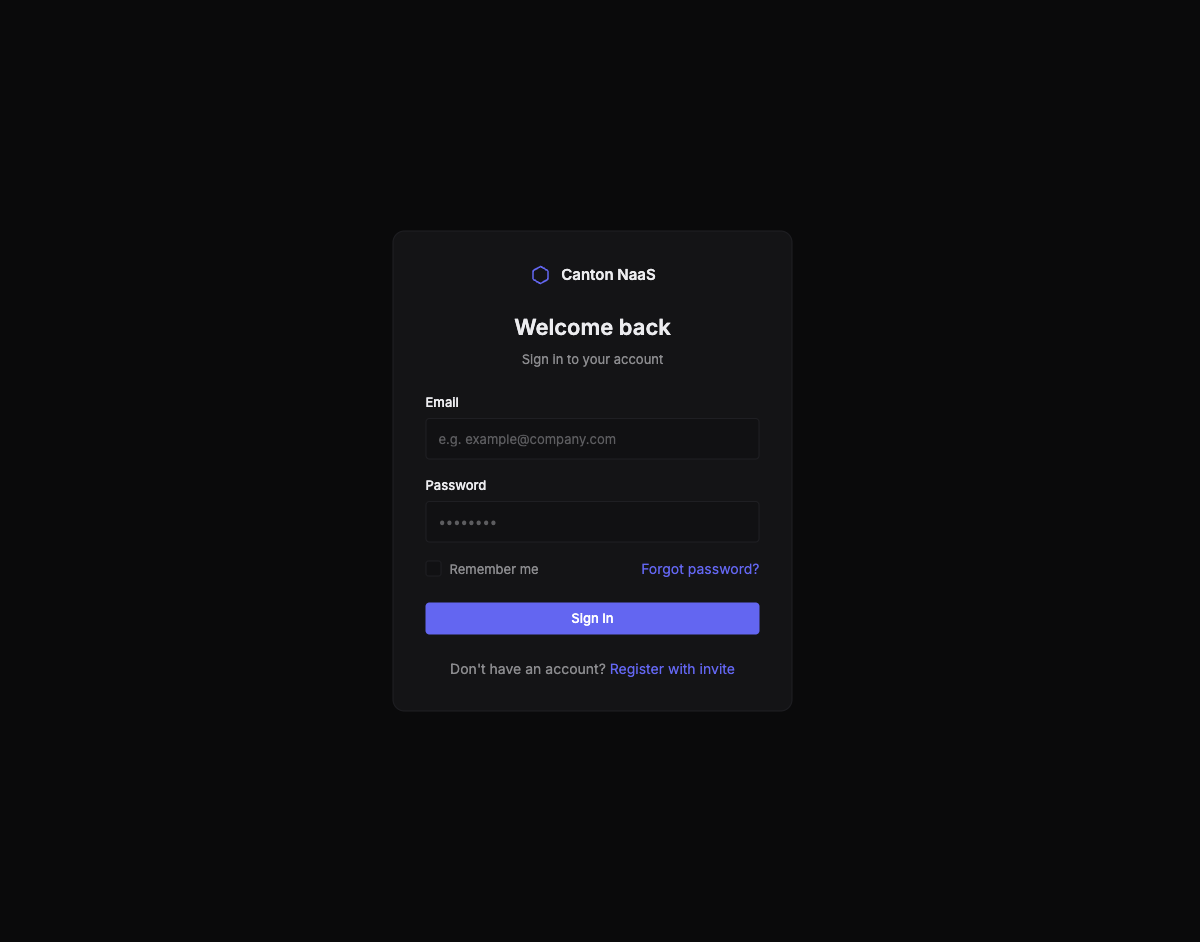
Step 3: Log In
After registration, navigate to the Console login page:
- Enter your email and password
- Optionally check Remember Me to stay signed in
- Click Sign In
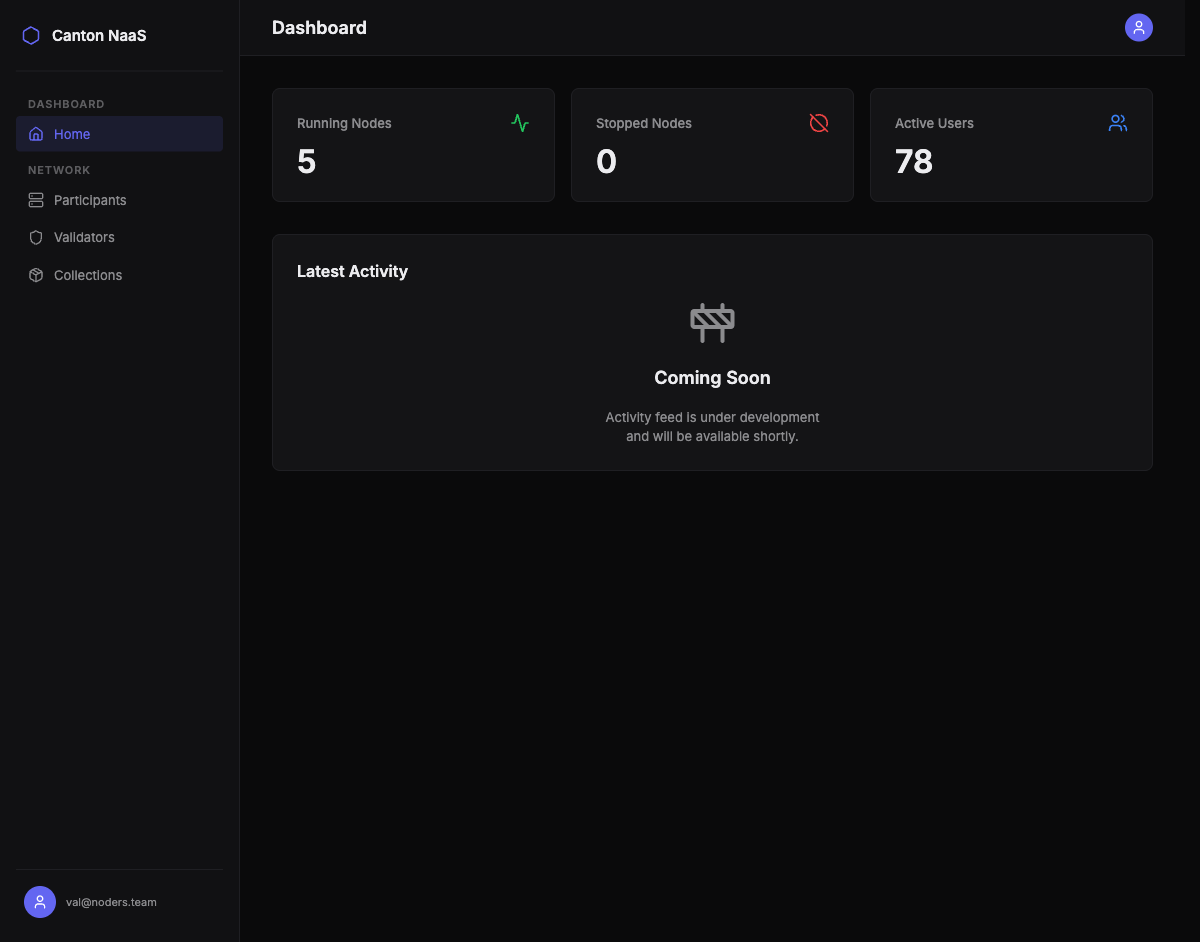
Step 4: Explore the Dashboard
After logging in, you’ll land on the Dashboard. This is your home base — it shows:
- How many nodes are running and how many are stopped
- Total active users across your participant nodes
- Quick health overview of your infrastructure
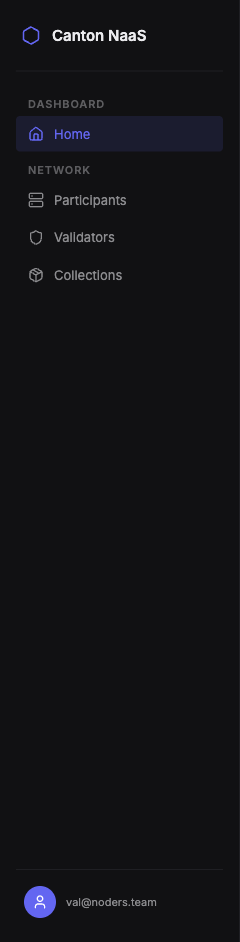
Step 5: Navigate the Console
The left sidebar provides access to all sections:
| Section | What You’ll Find |
|---|---|
| Dashboard | Health overview and key metrics |
| Participants | Your participant nodes, parties, and users |
| Validators | Your validator nodes and their status |
| Collections | Deployed Daml packages (DAR files) |
What’s Next?
- Managing Nodes — learn how to monitor and work with your participant and validator nodes
- Managing Users & Parties — set up ledger users and allocate parties
- Managing Packages — deploy Daml applications to your nodes